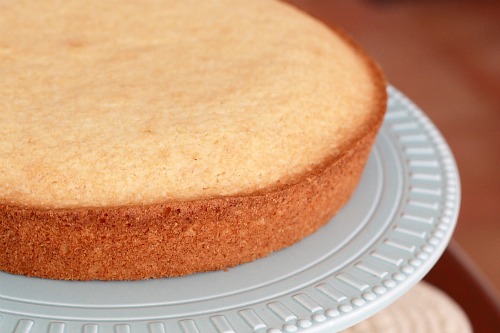
And this cupcake does it for me: moist, cakey, sweet and gently scented with the zest of a lemon. The frosting is smooth, creamy and , you guessed it, lemony. Pair this with a cup of tea and all your worries will melt away. Perfection.
Showing posts with label cake. Show all posts
Decadent Lemon Cupcakes
And this cupcake does it for me: moist, cakey, sweet and gently scented with the zest of a lemon. The frosting is smooth, creamy and , you guessed it, lemony. Pair this with a cup of tea and all your worries will melt away. Perfection.
Vanilla Bean Cupcakes with Citrus Glaze
These beauties bake up light and fluffy. They are perfectly sweet and speckled throughout with vanilla bean. Topped off with a lovely lemon glaze these are sure to please.
Gluten-Free Nutella Muffins
These are best served warm from the oven topped with a dollop of your fave vanilla ice cream (rice and coconut varieties are wonderful). A decadent dessert!
Labels:
cake,
cupcake,
gluten free,
grain free,
muffin,
nutella
Banana Chocolate Chip Bundt Cake
This is a fantastic cake based on Dorie Greenspan's recipe for Classic Banana Bundt Cake. It is reminiscent of banana bread but has a finer crumb. Perfect to serve for dessert topped with a scoop of french vanilla ice cream!
I love the flavor of banana and chocolate so adjusted the recipe and added dark chocolate chips. I am also a huge fan of spices when bananas are the main player in a recipe so cinnamon and nutmeg were a must for me. The flavors all work together incredibly well and result in an exceptionally delicious cake. Lastly, I wasn't keen on adding the required 2 cups of sugar to this recipe so exchanged it for coconut sugar. Great results!
Labels:
banana,
bundt,
cake,
chocolate,
chocolate chips,
dorie,
dorie greenspan
Black Chocolate Party Cake
I have been a proud owner of Rose's Heavenly Cakes cookbook for quite a while now and have tested and loved many a recipe within those gorgeous bound pages.
I have eyed up her Black Chocolate Party Cake for quite a long time too but never got around to making it. I think the fact that the batter contained walnuts that you need to first toast , remove the skins and then grind was the deterrent. But then, as if my magic/destiny/fate, I stumbled upon an adapted recipe on Technicolor Kitchen and the rest, as they say, is history.
Vanilla Bean Cake with Vanilla Buttercream Frosting
The special ingredient? Evaporated Milk - It adds a lovely level of moisture and richness.
As far as vanilla cakes goes, this one packs a punch. It is filled with vanilla. I added 4 teaspoons of vanilla bean paste to the batter and then even more pure vanilla extract to the frosting. This cake truly has the flavor you would associate with an old-fashioned birthday cake. The frosting really is the crowning glory.
The original recipe comes from Rock Recipes blog but the frosting is all mine. Combined they are a hit !
I do find this cake is best enjoyed the same day it is assembled. If you need to keep it in the refrigerator then just ensure it has a good hour to come to room temperature before serving.
This cake can also tend towards the crumbly crust side so I recommend a crumb coating of frosting, a stay in the fridge for 15 minutes, and then the final frosting.
So without further delay, let's get at it !
I won't bother re-posting the cake recipe but instead I will direct you to the source: The Best Vanilla Cake by Rock Recipes. The only change I made was I substituted vanilla bean paste for the pure vanilla extract.
Now on to the frosting.
My Perfect Vanilla Buttercream Frosting
RECIPE:
This recipe is enough to frost a double layer cake - and have enough left over for piping decorations around it too!
WHAT YOU NEED
2 cups unsalted butter at room temperature
6 cups icing sugar, sifted
2 tablespoons plus 2 teaspoons pure vanilla extract
4 tablespoons half and half or heavy cream
MAKE IT
IN BOWL OF STAND MIXER fitted with paddle attachment, slowly beat butter and sugar for 1 minute then increase speed to high and beat for 5 minute * do not shorten this time, it is essential to beat for at least 5 minutes to ensure a smoothy and fluffy consistency
SCRAPE down sides of bowl
ADD vanilla extract and cream
BEAT 1 MIN high speed
ADD food coloring if desired and blend well

Karmel Cake
I like simple cakes. Don't get me wrong, I like layer cakes topped with fluffy buttercream too any day of the week. But sometimes simplicity really works. This is one of those cakes. Now don't let me lead you down the path assuming simple refers to preparation vs presentation because with this cake there is a bit of boiling sugar to deal with at the onset. But from then on out it is smooth sailing. Top a slice of this gorgeous caramel cake with coffee-infused whipped cream and you have an elegant yet humble dessert.
This recipe hails from Rose's Heavenly Cakes - a cookbook that has become a new favorite for me around here and a go-to one when in the mood for cake. It has a vast variety of recipes that range from anything from oil-based cakes to light and delicate genoise. The latter half of the book focuses on smaller cakes (even cupcakes are featured) and finishes off with wedding cakes. Speckled throughout the book are stunning photos and tips that every baker should know and put to good use during their baking adventures.
Named after Rose's friend Karmel, this cake caught my attention because of the caramel flavor infusion created as a result of adding a boiled-down mixture of brown sugar, milk and butter. I adore the idea of homemade caramel sauce and the addition of the sauce to the batter really brings out the sweet flavor I love. The cake itself is not "gooey" in any way, shape or form which is surprising given the caramel addition. I prefer it served still a bit warm from the oven. If you need to store it overnight, wrap it in cling film. Ensure to raise up the wrap on top of the cake with toothpicks though because the top of the cake will start to get tacky as it rests and the cling film will pull off the top crust.
This is a perfect cake for any night of the week or even as a finale to a light lunch. Rose recommends serving it with coffee whipped cream (which I did ) but this is also lovely topped with a scoop of rich and creamy vanilla bean ice cream and a drizzle of your favorite butterscotch sauce.
So without further delay, let's get baking!
RECIPE:
*source recipe: Karmel Cake, Rose's Heavenly Cakes
WHAT YOU NEED
1 cup light brown sugar, preferrably Muscovado
1 1/4 cups milk, divided
2 tablesoons unsalted butter
2 large eggs, at room temperature
1 1/4 teaspoons pure vanilla extract
2 cups cake flour or bleached all-purpose flour, sifted into measuring cup
3 teaspoons baking powder
1/2 teaspoon salt
6 tablespoons unsalted butter
MAKE IT
SPRAY 9" round cake pan with cooking spray and cover base with parchment paper
SPRAY parchment paper with cooking spray (spray with the addition of flour is recommended)
SET oven rack in lower third of oven. Preheat oven to 350 degrees.
CARAMEL SAUCE
HAVE a 2-cup or larger heatproof glass measure, coated with nonstick cooking spray.
IN A MEDIUM SAUCEPAN, with a silicone spatula, stir together the brown sugar, 3/4 cup of milk and the butter.
BRING the mixture to a boil over medium-low heat, stirring constantly.
STOP stirring and boil until an instant-read thermometer registers 238 degrees, the soft ball stage.
TILT the pan to get enough depth for an accurate reading. It will take about 10 minutes or more to reach this stage, and the mixture will look slightly curdled.
WHEN sugar reaches temperature, immediately remove the pan from the heat and pour the mixture into a prepared glass measure to stop the cooking. You should have 1 cup. If less, add cold water to equal 1 cup.
SCRAPE mixture into a medium bowl and gently whisk in the remaining milk. Don't worry if some of the liquid crystallizes on the bottom, it will dissolve during baking.
PLACE the bowl on a wire rack and allow the mixture to cool until is is no longer warm to the touch. It will take about an hour, but to speed cooling, it's fine to set the glass measure in a bowl of ice water. If desired, stir the mixture a few times while cooling in order to equalize the temperature.
MAKE BATTER
IN MEDIUM BOWL, whisk the eggs and vanilla until just lightly combined.
IN BOWL OF STAND MIXER fitted with the flat beater, mix the flour, baking powder and salt on low speed for 30 seconds.
ADD the butter and cooled caramel.
MIX on low speed until the dry ingredients are moistened.
RAISE the speed to medium and beat for 1 1/2 minutes.
SCRAPE down the sides of the bowl.
STARTING on medium-low speed, gradually add the egg mixture in two parts, beating on medium speed for 30 seconds after each addition to incorporate the ingredients and strengthen the structure.
USING a silicone spatula, scrape the batter ito the prepared pan, and smooth surface evenly with a small offset spatula.
BAKE for 25 to 35 minutes or until a wire cake tester inserted in the center comes out clean and the cake springs back when pressed lightly in the center.
THE CAKE should start to shrink from the sides of the pan only after removal from the oven.
SERVE with sweetened whipped cream infused with some instant espresso powder. Or feel free to serve any way your heart desires !
Lakeland Lemon Cake
Recently a friend sent me a lovely little cookbook all the way from Great Britain. It is a book dedicated to English Teatime recipes and one that looked especially appealing to me was a small 7"round cake known as a Lakeland Lemon Cake. This is what I would refer to as a pound cake; dense, moist and far from crumbly. It also is best left for 48 hours before digging in so the crumb really firms up and the flavors all merge together. This lemon cake, lightly spiced with ginger and cinnamon, is perfectly fine served on its own or with a dollop of sweetened whipped cream. Traditionally it can also be divided into two layers and filled with lemon curd. Whatever your poison, you really should give this wonderful little cake a try. I am very glad I did !You may not have a 7" cake tin handy but they are not hard to find once you start looking. In fact, I purchased mine at my local grocery store. It is high sided with a removable bottom which worked out perfectly for this cake. You could most likely bake this in a traditional 8" tin as well but keep an eye on baking time as it would be reduced somewhat.
LET'S BEGIN !
A superb small cookbook to keep handy when teatime beckons

A superb small cookbook to keep handy when teatime beckons

RECIPE:
*source recipe: English Teatime Recipe
WHAT YOU NEED
8oz self-raising flour
6oz unsalted butter at room temperature
6oz caster sugar
2 large eggs, beaten lightly with a fork
pinch of salt
pinch of ground cinnamon
1/2 teaspoon ground ginger
grated rind and the juice of 1 large lemon
1 tablespoon milk (2% is fine)
MAKE IT
PREHEAT oven to 325F
GREASE BOTTOM AND SIDES of a 7 inch round cake pan
LINE BOTTOM of pan with parchment paper
IN LARGE BOWL of stand mixer fitted with paddle attachment, cream butter and sugar 4-5 minutes MED speed
SLOWLY add eggs, blending til combined
IN MEDIUM BOWL, sift together salt, cinnamon, ginger and flour
ADD to cake batter blending til combined but do NOT over-mix
ADD lemon rind, juice and milk mixing on low speed to fully incorporated into batter
POUR into prepared pan, level top, and bake for 1 hour
REMOVE from oven and let sit in pan 15 minutes
REMOVE cake from pan and place on cooling rack. When cooled wrap with cling film or place inside covered cake platter
ALLOW to rest 48 hours before slicing
ENJOY !
Coffee & Walnuts ...oh my !
My first taste of the renowned British favorite Coffee and Walnut Cake took place today. My life will never be the same again. Smooth, rich, creamy and wonderfully flavored with espresso. There is NOTHING better especially if you are in any way like me: a true coffee addict. I am hooked !I researched a few different recipes that seem popular but in the end tested out Nigella Lawson's Coffee and Walnut Layer Cake recipe. Ok granted, the one I made is not a double layer cake. For this recipe I simply halved the ingredients to create an amazing single layer cake. The fact is there are only two people in my family who like the flavor of coffee and I am one of them. A single layer cake for this household would be overkill but a single cake on the other hand is just right.
I was somewhat hesitant to start off because it requires grinding of walnuts in a food processor. That means messing around with sharp blades. I tend to be a tad accident prone and having already had a slice and dice related accident earlier this week I was somewhat "gun-shy". But I stayed alert, ground the nuts and came out of it with all digits intact.
When I read through Nigella's recipe I was also very surprised to see that the cake only takes 25 minutes to bake. It contains 1/2 cup of butter and 2 eggs making it quite a dense batter. I thought it would take far longer to bake and was hoping Nigella's online recipe wasn't riddled with typos. My fear was baseless. The recipe is error-free. The cake baked up perfectly in 25 minutes and is one of the moistest cakes I have ever eaten. Topped off with a buttery swirl of coffee frosting and one has nirvana on a plate.
So let's get started !
RECIPE:
*adapted source recipe: Coffee and Walnut Layer Cake, Nigella Lawson
WHAT YOU NEED
SPONGE
25 grams chopped walnuts
112 grams fine granulated sugar
112 grams unsalted butter at room temperature
100 grams all purpose flour
2 teaspoons instant espresso powder
1 1/4 teaspoons baking powder
1/4 teaspoon baking soda
2 eggs at room temperature
1 tablespoon milk
FROSTING
350 grams icing sugar, sifted
175 grams unsalted butter at room temperature
2 1/2 teaspoons instant espresso powder dissolved in 1 tablespoon boiling water
walnut halves for decoration
MAKE IT
PREHEAT OVEN to 350F
GREASE an 8" round cake pan with baking spray and line bottom with parchment paper
IN FOOD PROCESSOR, grind together walnuts and sugar until combined into a fine nutty powder
IN BOWL OF STAND MIXER (fitted with paddle attachment) or large bowl if using hand-held mixer, beat butter 1 minutes MED speed until creamy
ADD SUGAR/WALNUT mix and beat 1 minutes MED speed
ADD all other ingredients blending well until thoroughly combined and smooth appearance
POUR into prepared pan and level out with icing spatula
BAKE 25 minutes
LET COOL in pan 10 minutes then remove and let cool completely on cooling rack
FROSTING
IN BOWL OF STAND MIXER (fitted with paddle attachment) or large bowl if using hand-held mixer, beat butter 1 minute MED speed until creamy
ADD in icing sugar and blend 2 minutes until butter and sugar come together into a heavy even consistency
ADD dissolved espresso powder and beat 2-3 minutes scraping down sides when needed
SPREAD frosting on top of cooled cake
DECORATE with walnut halves
ENJOY !
Also seen here:

Heavenly Coconut Seduction Cake
For my birthday I received the gorgeous cookbook Rose's Heavenly Cakes. I have read rave reviews about this book and couldn't wait to test out a recipe. I had my sights set on the Heavenly Coconut Seduction Cake but the problem was that I didn't have a can of cream of coconut. To say finding cream of coconut in Ontario, Canada is challenging would be an understatement. So my cake recipe had to wait but not for long.My family and I decided to take a jaunt over to the US this past weekend and enjoyed an incredible shopping excursion in Syracuse, NY. I immediately hit up Pottery Barn and Williams Sonoma. I am in love with both stores and definitely plan on being a returning visitor.
While at Williams Sonoma, I decided to ask a clerk where I could find the infamous Cream of Coconut. She swiftly pointed me in the direction of a Wegman's and advised me that Wegman's is simply the best of the best. This store, sent from the heavens it seemed, would have everything and more. As I have never even seen a Wegman's before I thought that perhaps I would be in for a treat. I was. The store was HUGE! It had everything I could imagine including the cream of coconut. Their candy section alone was impressive. I have never seen a grocery store with so many selections before, let alone one that divides M&Ms into the difference colors and loads them up into lovely little dispensers for easy access. My daughter was delirious over the bakery department. She states she has never ever EVER seen so many different types of bagels in her life. Last but not least, they had jars of imported clotted cream which I was desperately seeking to make a clotted cream cake! So Wegman's has won me over. I am a true fan now and cannot wait to return to the US for another tour.
Back to the cake: after successfully locating cream of coconut, I started making this cake within one hour after returning from my trip. It is amazing how one can barely stand up one minute, exhausted to the bone, yet the baking addiction, forever present, quickly rises one up on their feet again and fills them with energy! Only after the cake was baked, cooled, frosted and eaten did I fall into bed and sleep like a baby.
The coconut cake is not a complex recipe at all. It has coconut in the batter as well as sprinkled on top. The cream of coconut adds moisture and flavor. The frosting is nothing more than stabilized whipped cream to which I added a bit of vanilla and a bit of coconut extract. By adding a cornstarch stabilizer blend to the whipped cream you avoid whipped cream separating and it preserves the consistency for 24 hours refrigerated. What I liked just as much was how the stabilizer changed the texture and flavor of the whipped cream to that one a smooth creamy heaven with hints of custard flavor. I could have easily sat back and eaten loads of it by the spoonful it was simply that good.
To get started have a small food processor nearby; one that can accommodate about 1 cup of dry ingredients. Now let's begin!
The Heavenly Coconut Seduction Cake baked and ready for frosting!

RECIPE*:
*altered source recipe for Heavenly Coconut Seduction Cake: Rose's Heavenly Cakes
WHAT YOU NEED
CAKE
3 large egg whites at room temperature
2/3 cup creamed coconut (run through the food processor first to combine thoroughly)
3/4 teaspoon pure vanilla extract
3/4 teaspoon coconut extract
1/2 cup minus 1 tablespoon fine granulated sugar
1/2 cup desiccated unsweetened coconut
2 cups cake flour (sifted first into measuring cups and leveled off). I usually simply measure this to ensure accuracy. You are looking for 7 ounces (200 grams) of flour
2 1/4 teaspoons baking powder
1/2 teaspoon salt
1/2 cup (1 stick) unsalted butter at room temperature, cut into small chunks
FROSTING
2 tablespoons powdered sugar
1 teaspoon cornstarch
1 cup heavy whipping cream
1/2 teaspoon pure vanilla extract
1/2 teaspoon coconut extract
sweetened shredded coconut (optional)
MAKE IT
MOVE OVEN RACK to lower third of oven
PREHEAT oven to 350F
GREASE bottom and sides of one 9 inch round cake pan. Line bottom with parchment paper and spray parchment paper with baking spray (a spray with added flour is great too).
IN MEDIUM BOWL, whisk together egg whites, 3 tablespoons cream of coconut, vanilla and coconut extracts. Set aside.
IN FOOD PROCESSOR, pulse together sugar and coconut until you have a fine powder
IN LARGE BOWL (or bowl of stand mixer), mix coconut/sugar mixture, flour, baking powder and salt on low speed for 30 seconds (stand or hand held electric mixtures both work well)
ADD butter and remaining cream of coconut
MIX AT MEDIUM SPEED for 1 1/2 minutes scraping down bowl when required
KEEPING BEATING at medium speed and slowly add egg whites mixture in 2 parts, beating 30 seconds after each addition
POUR batter into prepared pan
SMOOTH surface evenly
BAKE 30-40 minutes or until toothpick inserted in center comes out clean. Mine was perfect at 30 minutes on the dot! NOTE: do not remove until cake starts to pull away from sides of pan.
LET COOL in pan on cooling rack for 10 minutes
REMOVE from pan and allow to cool on cake stand
FROSTING:
IN SMALL SAUCEPAN, over med/low heat, whisk together sugar and cornstarch.
GRADUALLY add 1/4 cup heavy cream
BRING TO LOW BOIL stirring continuously
SIMMER for a few seconds until thickened
SCRAPE mixture into heat proof bowl
LET COOL to room temperature
STIR in vanilla extract
IN LARGE MIXING BOWL (stand mixing bowl if using), BEAT remaining whipped cream until traces of beater marks begin to appear
ADD cooled cornstarch mixture
BEAT until stiff peaks form
FROST top of cake with whipped cream
SPRINKLE with sweetened shredded coconut if desired
A must have !
The Heavenly Coconut Seduction Cake baked and ready for frosting!
RECIPE*:
*altered source recipe for Heavenly Coconut Seduction Cake: Rose's Heavenly Cakes
WHAT YOU NEED
CAKE
3 large egg whites at room temperature
2/3 cup creamed coconut (run through the food processor first to combine thoroughly)
3/4 teaspoon pure vanilla extract
3/4 teaspoon coconut extract
1/2 cup minus 1 tablespoon fine granulated sugar
1/2 cup desiccated unsweetened coconut
2 cups cake flour (sifted first into measuring cups and leveled off). I usually simply measure this to ensure accuracy. You are looking for 7 ounces (200 grams) of flour
2 1/4 teaspoons baking powder
1/2 teaspoon salt
1/2 cup (1 stick) unsalted butter at room temperature, cut into small chunks
FROSTING
2 tablespoons powdered sugar
1 teaspoon cornstarch
1 cup heavy whipping cream
1/2 teaspoon pure vanilla extract
1/2 teaspoon coconut extract
sweetened shredded coconut (optional)
MAKE IT
MOVE OVEN RACK to lower third of oven
PREHEAT oven to 350F
GREASE bottom and sides of one 9 inch round cake pan. Line bottom with parchment paper and spray parchment paper with baking spray (a spray with added flour is great too).
IN MEDIUM BOWL, whisk together egg whites, 3 tablespoons cream of coconut, vanilla and coconut extracts. Set aside.
IN FOOD PROCESSOR, pulse together sugar and coconut until you have a fine powder
IN LARGE BOWL (or bowl of stand mixer), mix coconut/sugar mixture, flour, baking powder and salt on low speed for 30 seconds (stand or hand held electric mixtures both work well)
ADD butter and remaining cream of coconut
MIX AT MEDIUM SPEED for 1 1/2 minutes scraping down bowl when required
KEEPING BEATING at medium speed and slowly add egg whites mixture in 2 parts, beating 30 seconds after each addition
POUR batter into prepared pan
SMOOTH surface evenly
BAKE 30-40 minutes or until toothpick inserted in center comes out clean. Mine was perfect at 30 minutes on the dot! NOTE: do not remove until cake starts to pull away from sides of pan.
LET COOL in pan on cooling rack for 10 minutes
REMOVE from pan and allow to cool on cake stand
FROSTING:
IN SMALL SAUCEPAN, over med/low heat, whisk together sugar and cornstarch.
GRADUALLY add 1/4 cup heavy cream
BRING TO LOW BOIL stirring continuously
SIMMER for a few seconds until thickened
SCRAPE mixture into heat proof bowl
LET COOL to room temperature
STIR in vanilla extract
IN LARGE MIXING BOWL (stand mixing bowl if using), BEAT remaining whipped cream until traces of beater marks begin to appear
ADD cooled cornstarch mixture
BEAT until stiff peaks form
FROST top of cake with whipped cream
SPRINKLE with sweetened shredded coconut if desired
ENJOY !
Labels:
cake,
coconut,
cream of coconut,
frosting,
whipped cream
Victoria Sponge with Berries & Whipped Cream
Last week I celebrated my big 4-0 birthday! And in doing so, I also learned that I have somehow converted into a foodie (baker) snob to a great degree over the past year. When asked about my preferred birthday dessert I had to say nothing store bought. It must be homemade! Nothing else will suffice. No family member wanted to take on the baking challenge so I gladly stepped in.I wasn't in the mood for your typical birthday cake topped with buttercream and candles. Instead I was craving fluffy whipped cream and fresh fruit layered throughout a light, golden cake. The perfect answer: a Victoria Sponge filled with seedless jam, raspberries, sweetened whipped cream and topped with shaved dark chocolate.
I have a recipe already on Lemon Drop for Victoria Sponge though that one has a frosting in the center. I did stick to the sponge cake recipe in that post but , as you can see, dramatically changed the filling and finishing touches. It was the best birthday cake I have ever eaten!
LET'S GET STARTED
RECIPE:
WHAT YOU NEED
1 cup fine white sugar
1 cup unsalted butter at room temperature
4 large eggs, beaten lightly
1 cup self-raising flour
1 teaspoon baking powder
2 tablespoons of milk (2% works fine)
JAM, FRUIT and WHIPPED CREAM FILLING:
6-12 oz. good quality, seedless raspberry jam (I used half a 12 oz jar but feel free to slather the whole thing on there if you want !!)
1 pint of fresh raspberries
2 cups whipping cream
1 1/2 teaspoons pure vanilla extract
1 tablespoon fine granulated sugar
1/4 cup shaved dark chocolate
MAKE IT
PREHEAT oven to 350F.
BUTTER two 8-inch round cake pans
LINE both pans with parchment paper
MIX all cake ingredients in a large bowl until blended. Batter should be smooth.
DIVIDE batter between the two pans and smooth the surface with a spatula.
BAKE for 20 minutes; do the finger test - touch the center and if it springs back it is done. If not give it another minute or two and try again.
COOL cakes on baking racks.
REMOVE cakes from pans once cooled.
PLACE one of the cooled cakes on a cake platter
SPREAD with jam
LAYER 3/4 of the raspberries over the jam, reserving rest of raspberries for topping
MAKE THE WHIPPED CREAM
In large bowl, and with your electric mixer, whip together 2 cups of whipping cream (35% fat) with 1 1/2 teaspoons pure vanilla extract and 1 tablespoon of fine granulated sugar. If you want to keep the cake longer than 1 hr at room temperature then add one small packet of Whip It! stabilizer to the cream mix. Whip until soft peaks form.
DIVIDE the whipped cream topping in 1/2 and smooth one 1/2 over the first layer of cake
PLACE second layer of cake on top
SMOOTH remaining whipped cream topping over top of cake
DECORATE with remaining raspberries and shaved chocolate.
ENJOY !!!
Vanilla Custard Powder Cake
So many things to love: it is egg-less, it can be made all in one bowl, and it has the most amazing vanilla flavor thanks to the addition of vanilla custard powder.
This cake is crunchy and flaky on the outside while the inside is rich, dense and moist. I find it has better depth of flavor and a nicer consistency if it rests for a few hours before slicing.
It is especially nice topped with berries and a dollop of whipped cream. It is wonderful for dessert and very welcome at afternoon tea.
I had never made a cake with custard powder before and I am so happy I decided to experiment yesterday. I was lucky enough to find vanilla custard powder but if you only have plain on hand, then simply add pure vanilla extract as shown in the recipe.
Fresh out of the tin, the vanilla custard powder is light pink in color. Initially I was worried this would result in a pink cake but it didn't. Instead the cake was a lovely golden yellow inside and out.
This custard cake is now a family favorite and will be served in our home many, many times in the future.
For the source recipe, please visit My Diverse Kitchen.
If you love vanilla and a recipe that comes together in a flash then this cake will be your new best friend!
My custard powder of choice:

Fresh out of the oven - a golden crust.
It actually reminds me of a sweet scone.
Double Vanilla Sour Cream Cake
I also love vanilla and had recently picked up some gorgeous Madagascar beans. There is nothing like seeing the flecks of vanilla bean in a cake to really make one feel all earthy and warm. So in went the scrapings of one vanilla bean and 2 teaspoons of pure vanilla extract.
The end result is a moist, rich and beautifully infused vanilla cake.
This will be perfect for dessert topped with macerated strawberries and whipped cream.
LET'S BEGIN
RECIPE:
WHAT YOU NEED
8 1/2 x 4 1/2 inch loaf pan
1 cup all-purpose flour, sifted
1/2 cup ground almonds - remove any lumps
2 teaspoons baking powder
pinch of salt
1 cup superfine sugar
1/2 cup full-fat sour cream
3 large eggs
2 teaspoons pure vanilla extract
1 vanilla bean, scraped
1/2 cup flavorless oil (ie canola or safflower. I used Becel)
MAKE IT
PREHEAT oven to 350F
GREASE a 8 1/2 x 4 1/2 inch loaf pan
IN LARGE BOWL whisk together first for 5 ingredients
ADD remaining ingredients and whisk until smooth - do not over-whisk to ensure a light cake
POUR batter into prepared pan and smooth the top
PLACE loaf pan on a cookie sheet
BAKE for 50 minutes or until toothpick inserted in center comes out clean
ALLOW to cool in pan 5 minutes
ALLOW to cool completely on cooling rack
ENJOY !!!!
Flavours of Prince Edward Island
Yesterday my hubby brought this cookbook home for me and I am thrilled ! This book, for lack of a better word, is BEAUTIFUL. Let's first start by saying I adore Prince Edward Island. Always have and always will. In fact, my long term goal (or maybe even short term if I play my cards right!) is to relocate there permanently. The island is a dream; filled with green rolling hills, bordered by gorgeous red dunes that meet the sea. And the people? The nicest I have ever met!
Now back to the cookbook.
Flavours of Prince Edward Island - a culinary journey
~ Jeff McCourt, Allan Williams & Austin Clement
There are several sweet desserts in this book such as Warm Blueberry Brown Butter Cakes
(which makes me want to lick the page) and a Cranberry and Coconut Tart that leaves one daydreaming of eating a slice with a dollop of whipped cream.

STAY TUNED for the Potato Chocolate Cake Recipe Review
Flavours of Prince Edward Island - a culinary journey
~ Jeff McCourt, Allan Williams & Austin Clement
The photos alone reeled me in immediately and then I saw the recipes. Wow ! There is just so much here aching to be tested out in my kitchen (and digested by my tummy) . I cannot wait to get started. As my blog is baking specific, I won't be sharing my results of the gorgeous pot roast recipe that greets you early on in this book but you can bet your bottom dollar my family will be enjoying it for Sunday dinner !
There are several sweet desserts in this book such as Warm Blueberry Brown Butter Cakes
(which makes me want to lick the page) and a Cranberry and Coconut Tart that leaves one daydreaming of eating a slice with a dollop of whipped cream.
After much thought, I decided to start off with a chocolate cake. Boring choice? I think NOT! This one has a special Island ingredient- one of PEI's most famous in fact and no, it has nothing to do with Anne of Green Gables!.
Later this week, I will be sharing with you tales of my baking adventure and a review when I make Chocolate Potato Cake with Red Raspberry Puddles, page 195.

The book describes it as follows: "... the potatoes made the cake super-moist and really dense." "This cake is delicious with raspberry sauce" which the authors refer to as raspberry mud puddles. Personally, the photo speaks for itself. It looks delicious. I can barely wait to sink my teeth into a slice of this !
So to summarize, so far, I love this book and without a doubt, I love PEI. Add baking and PEI together and you have my version of heaven.
My other great love that tops my list: My family = my two beautiful girls, my handsome boy and of course, my dear sweet man. But truth be told, I think I love my man a little bit more now because he bought me this book :)
STAY TUNED for the Potato Chocolate Cake Recipe Review
My First CAKE POP !

This deserves somewhat of a special announcement; after all, it is the birth of my FIRST CAKE POP! Could it be a tad rounder? Yup, but I forgive myself - I mean, come on, it was my first stab at this. Anyway, I think I will call him George. Not sure why but it suits.
I had been reading about these cute little treats for awhile now and finally took the plunge. I had some left over frozen cupcakes in the freezer and thought, why not?
First I went out and picked up this book:

I gave it a quick read to get the basics down and then I started "cake poppin'" !
I added some vanilla butter cream icing to the crumbled cake, rolled it into 1 inch balls and set them in the freezer for 15 minutes. Then out they came, in went the lollipop stick and DUNK - right into a pot of melted chocolate candy melts. The finishing touch: sprinkles.
Easy? Yes but it does have a method to the madness. Your cake must be cool, not frozen, when dunking or it will crack when cooled. Your stick only goes in about 1/2 inch, no more! Your candy coating must be melted but not too hot or it won't set right. Plus, if it is too thick add a little bit of veggie oil. And for the type of cake, too moist and it tastes doughy so stick with a simple cake recipe !
Am I hooked? Actually, yes I am. I went out and stocked up on molds, decorations, edible markers, and a slew of candy melts. Excited to make the next batch ! Perhaps Easter treats for my kids classmates? Quite possibly! I do know that next time I will be making a homemade cake base, using flavor-infused melts and throwing in a touch of spring for good measure !
Stay tuned ...
Carrot Cake with Cream Cheese Icing
This recipe goes out to Jane and her 5 furry little white friends (hey, they should have a treat now and then too!)Carrot Cake... Need I say more? You either love it or you hate it. I can safely say I can count, on one hand, the number of people I have met in my lifetime that do not like carrot cake.
What makes a good carrot cake? the carrots, the spices? Nope, the ICING !! The more icing the better but what makes carrot cake icing so darn good? The answer is simple: CREAM CHEESE !
I have baked many a carrot cake in my day but Anna Olson's one is the winner. Moist and tender with a kick-ass icing. No need to even layer it. An 8inch square pan is all you need.
Rather than reposting here I will simply redirect you to the recipe link. Give this one a try, you will NOT be disappointed.
A word of advice, use crushed pineapple vs diced. Trust me on this one.
Anna Olson's Carrot Cake
Nothing as sweet (or sour) as a lemon
Given the title of my blog, I thought it only fair to kick it off with a lemon recipe.Yesterday I made, by far, the most delicious dessert ever. My family rated it their top 10 as did I. And no, it doesn't fall into the "healthy food" category. Oh well, so be it.
Because I don't want to get slapped with a copyright lawsuit, I am simply going to post the link here and I encourage you all to try it. Don't be intimidated by a "water bath" either. It simply involves placing your ramekins in a roast pan then filling the pan with hot water until the water is midway up the sides of the ramekins.
This recipe turned out perfectly. The sponge cake was moist and light. The surprise of pudding underneath was tangy, sweet and divine !!!! Top it with sweetened whipped cream for a true taste of heaven.
If you love lemons, try this recipe. You will NOT, I repeat, WILL NOT, be disappointed.
Subscribe to:
Posts (Atom)